Config
Configure basic settings for apps, APIs, and groups, set up custom color schemes, define a platform login, and upload documentation files and style sheets.
Table of Contents
Custom Styles:
- I want to customize platform styles. What do I do?
- What color scheme changes are supported on my platform deployment?
- What style sheets do I use to update the color scheme of my platform deployment?
- How do I download the custom_template.less template?
- How do I upload my custom.less file after I have updated it?
- After I update my custom.less file, how do I apply the changes to my platform deployment?
- How do I rebuild my color scheme styles after I have uploaded the custom.less file?
- What is a sprite?
- How do I modify sprite colors?
- What is less.js and what are the benefits?
- How do I make my style and sprite file changes visible on my platform deployment after I regenerate styles?
- How do I configure a custom footer?
- How do I configure a custom logo?
Logins:
- How does login configuration work?
- Does the platform provide a default login?
- What is a Target Host?
- What login page integration modes are supported?
- How do I enable and customize a platform login?
- How do I disable a platform login?
Resources:
- What is a Resource?
- How do I upload style sheets to the platform?
- How do I upload Sprite files to the platform?
- How do I upload content to the platform?
- How do I modify the landing page for the platform?
- How do I upload the API and Online Help content style sheet to the platform?
Configuration:
- How do I configure API settings?
- How do I configure app settings?
- How do I configure group settings?
Workflow:
- Which workflows can I customize?
- How do I set up and manage custom workflows?
- How do I specify a custom workflow for APIs?
- How do I specify a custom workflow for apps?
- How do I specify a custom workflow for app/API contracts?
- How do I specify a custom workflow for groups?
- How do I specify a custom workflow for tickets?
- How do I specify a custom workflow for OAuth grants?
Custom Styles:
I want to customize platform styles. What do I do?
The platform comes with a default look and feel, including styles, colors, navigation, logo, and so on. These platform default styles are stored in a stylesheet which is dynamically generated from a file named custom.less.
If you want to customize platform styles, follow the basic steps below. If you want to start from the platform default styles and are modifying for the first time, follow the steps in To customize platform styles for the first time. If you have already modified your styles and want to make additional changes, use To make additional changes to customized styles.
For more information on what you can change, see What color scheme changes are supported on my platform deployment?
Note: When you upload new styles to the platform, you'll need to clear your browser cache and refresh the page to see the changes.
To customize platform styles for the first time:
- Log in as the Site Admin.
- Navigate to Administration > Config > Custom Styles.
- Click Download Template to download the default platform template, custom_template.less. For full instructions, see How do I download the custom_template.less template?
- Rename the downloaded file from custom_template.less to custom.less and modify it as needed.
- Upload the revised file to the platform. For instructions, see How do I upload my custom.less file after I have updated it?
- Clear your browser cache and refresh the page to see the changes.
To make additional changes to customized styles:
- Log in as the Site Admin.
- Navigate to Administration > Config > Custom Styles.
- Click Download to download your customized style sheet, custom.less.
- Choose a save location to save the file.
- Modify the styles as needed.
- Upload the revised file to the platform. For instructions, see How do I upload my custom.less file after I have updated it?
- Clear your browser cache and refresh the page to see the changes.
What color scheme changes are supported on my platform deployment?
You can change the color scheme for platform elements such as:
- Site background color
- Left and top navigation
- Text content area
- Pop-up dialog elements
- Horizontal rules
- Text color of input fields
- Default link colors
Color scheme updates are performed by updating the custom.less style sheet. For an overview of the process, and instructions, see I want to customize platform styles. What do I do?
What style sheets do I use to update the color scheme of my platform deployment?
The platform includes a style sheet template, custom_template.less, that you can download, rename to custom.less, and update based on your requirements. For full instructions, refer to To customize platform styles for the first time.
Here are some general points regarding the platform style sheet:
- All of the variables and sprite file references in the custom_template.less file are configured with defaults that represent the look and feel of a default platform installation.
- All custom.less style sheet variables are commented out. For site elements you want to customize, remove the comment from the element and then customize the variable.
- Color management for icons is accomplished by modifying the Adobe Illustrator side production file that includes the sprite icon files.
How do I download the custom_template.less template?
The Administration > Config > Custom Styles section includes a Download Template button that allows you to download the custom_template.less template.
To download the custom_template.less template:
- Log in as Site Admin.
- Navigate to Administration > Config > Custom Styles.
- In the Styles Customization section, click Download Template. A download dialog box displays.
- Select the Save File option and click OK.
How do I upload my custom.less file after I have updated it?
The Administration > Config > Custom Styles section includes an Upload button that allows you to upload the custom.less file after you've customized it.
To upload the modified custom.less file:
- Go to Administration > Config > Custom Styles.
- In the Styles Customization section, click Upload. A File to Upload dialog box displays.
- Click Browse to navigate to the location of your custom.less file and upload it. When you upload the file, the platform style sheets are automatically regenerated. When regeneration is complete a confirmation message is displayed.The custom.less file is stored in the \resources\less directory.
After I update my custom.less file, how do I apply the changes to my platform deployment?
After you update your custom.less file, you can apply the changes to the platform deployment by uploading the modified file. When you upload the file, the site automatically rebuilds the site style sheets and the changes are reflected on the site. See How do I upload my custom.less file after I have updated it? for more information.
If the style sheet and sprite file changes are not visible immediately after the style sheet rebuild process is complete, clear the browser cache and then refresh.
Note: If you want to go back to the default styles at any point, you can always go back to the custom_template.less file. See To customize platform styles for the first time.
How do I rebuild my color scheme styles after I have uploaded the custom.less file?
The Administration > Config > Custom Styles section includes a Rebuild Styles option that allows you to Initiate a rebuild of the platform style sheets. This option is primarily used when a platform update is installed that includes style sheet changes. This option is primarily used when a site update is performed where style sheet changes were made.
For example, if an update was applied to the site and the update included new additions to the UI that required style sheet changes; this would mean that the style sheets were not active immediately after the update was completed. In this case, the Rebuild Styles option would complete update process by regenerating the style sheets.
To rebuild site style sheets:
- Navigate to Administration > Config > Custom Styles.
- In the Styles Customization section, click Rebuild Styles. The rebuild process takes approximately one minute. After style sheets have been rebuilt, the "Platform style sheets have been successfully regenerated using custom.less" confirmation message displays.
- After the style sheets are regenerated, clear the browser cache and refresh the screen to view the changes.
What is a sprite?
The platform UI includes a series of standard icons that accommodate quick filters, help, menu navigation names, window titles, etc. These standard icons cannot be changed, but when a UI customization is performed the color of the icon can be changed.
- A sprite is a two-dimensional image that is used to change the color of the standard icons on the platform when a UI customization is performed.
- When developing your UI customization design, in addition to deciding what colors you want to use on your site, you must also decide what icons and "contrasts" are needed before moving forward with the customization tasks. This task should be part of your site UI design process.
- The platform provides a set of sprite files with the default theme. You can view how the sprite files are specified in the custom_template.less file. Each one is commented with " // path to the image file" and lists a URL that represents the path of the file.
- Note that sprite files should always be uploaded after you have uploaded and regenerated your style sheets.
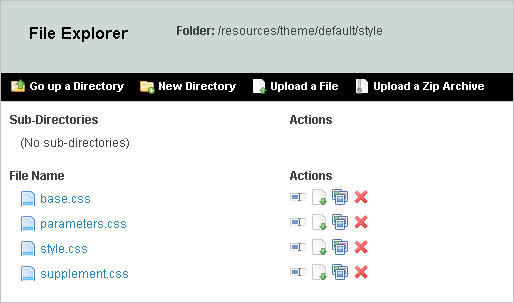
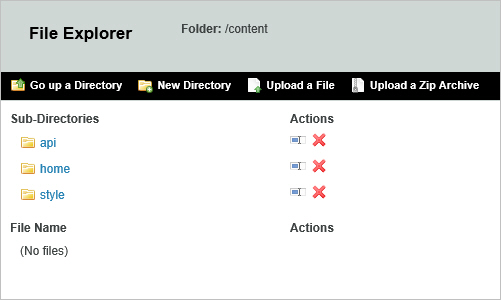
![]()
Figure. Upload sprite files to \images folder via Administration > Config > Resources (Resources > File Manager)
How do I modify sprite colors?
During the UI design phase of your platform deployment your brand standards and colors are selected. The site includes a series of icons. The icon design is fixed and part of the site design, but the icon color and contrast can be changed. The general process for modifying icon colors involves the following steps:
- To change icon color and contrast, a series of sprite files that define the color contrast for platform icons must be updated by modifying the Adobe Illustrator production file provided by SOA Software.
- The process involves selecting the Artboard that includes the icon you want to modify, changing the icon color, and saving the Artboard to a PNG file. The PNG file(s) must then be uploaded to the /resources/theme/default/styles/images folder via Administration > Config > Resources to be updated in your platform UI.
- For detailed instructions on how to modify sprite files, click here.
- If you save a sprite file to filename that is not referenced in the custom_template.less file, edit the custom_template.less file and update the path to reflect the new filename. For example, if a particular icon was gray and you wanted it changed to orange, you might save your artwork to a new filename that reflected the color change or you could develop a naming convention using numbers, etc. The following example is an excerpt from a custom_template.less file that illustrates a sprite file URL reference:
// path to the image file of 18px sprites of leftnav navigation items that reflect the current section of "subject" details // @leftnav-active-icons: @icon-active-18px: url("images/sprites_18_color.png"); - If you updated a style sheet, use the Rebuild Styles option to regenerate the styles before uploading any new sprite files. Note that this function rebuilds all the folders in the /resources/theme/default/styles directory. Because of this, new sprite files must be uploaded after the site styles are regenerated.
- If you add a new Artboard to the Adobe illustrator production file, or save an existing Artboard as a different name, you must upload the updated sprite files to platform via the Administration > Config > Resources section and save them in the /resources/theme/default/style/images folder. This step should be performed after the Rebuild Styles option is used.
- After styles are regenerated and sprite files are uploaded, clear the browser cache and refresh the screen to view the changes.
- For information on uploading Sprite files to the platform, see How do I upload Sprite files to the platform?
What is less.js and what are the benefits?
The custom.less style sheet is implemented with LESS which is a dynamic stylesheet language that extends the static CSS by adding a dynamic behavior in the CSS.
- LESS.JS is a CSS pre-processor that allows you to write your own styles using the LESS pre-processor language and save them in a .LESS file.
- LESS.JS will compile the file into pure CSS. LESS variables are defined with an @ sign and Variable assignment is done with a colon (:). After you update the custom.less style sheet and rebuild, the values of the variables are inserted into the output CSS document.
- LESS helps reduce the size of the CSS and allows you to quickly and easily make changes to the platform color scheme and sprite files by updating one custom.less file and then rebuilding the complete set of site stylesheets.
How do I make my style and sprite file changes visible on my platform deployment after I regenerate styles?
In most cases, after you regenerate styles and upload your sprite files you must clear the browser cache and refresh the screen to view the changes.
How do I configure a custom footer?
The footer customization process includes the following steps:
- Footer customization is done with an HTML file that acts as a template. The HTML file is uploaded to the /resources/templates/footer with the name footer.htm.
- Links in the footer.htm file can have a class attribute with values "ext" or "dialog." When a link has a class "ext," clicking on the link will open a popup window. When the link has a class "dialog," clicking on the link will open the href in a dialog window.
- A footer can be uploaded using the File Manager in the Site Administration > Config > Resources > Resources section. An uploaded footer becomes effective within five minutes if the page is refreshed after five minutes.
- If the footer.htm file requires additional styles, you can add them to custom.less.
How do I configure a custom logo?
The process of adding a custom logo to the platform includes configuring your logo to comply with the logo file requirements (listed below), specifying the logo filename in the template (see To specify your logo filename in the template below) and uploading it to the platform (see To upload your logo file below).
Logo File Requirements
Your logo must comply with the following requirements:
- Width should be no more than 295px.
- Height should be 46px.
- Background must be transparent.
- File format should be PNG.
- Specify the logo filename in the custom.less style sheet.
To specify your logo filename in the template:
- Go to Admin > Config > Custom Styles.
- Click Download to download a new custom_template.less file and rename it to custom.less.
- Load the custom .less file into an HTML editor and change the filename for this entry: @logo-img: url("images/<image_name>.png"); to the new logo filename.
- In the Custom Styles section, click Upload to upload the updated custom.less file. Note that the upload process automatically executes the Rebuild Styles function, which rebuilds the style sheets.
To upload your logo file:
- Go to Admin > Config > Custom Styles and click Rebuild Styles to ensure that all the proper style folders are generated. Note: If you specified a custom logo name in custom.less and already uploaded the style sheet the rebuild step is not required.
- Go to Resources > Resources > File Manager and navigate to the theme/default/style folder:
- Click New Directory and name it images.
- Click into the /images folder and upload your logo file. Note that the logo must comply with the stated logo requirements.
- If for some reason the new logo does not display, try refreshing your browser cache and/or go to Admin > Config > Custom Styles and click Rebuild Styles.
Logins:
How does login configuration work?
As part of the initial platform setup, a Site Administrator installs and a series of domains that represent an enterprise's login requirements for the platform:
- Supported domain types for the platform login include Facebook, OpenID Identity Provider (e.g., Google), LDAP, and CA SiteMinder.
- The platform installation also includes a default platform domain that is automatically enabled when a new user account is created.
After the login domains are installed, they must be enabled and customized with a Target Host (virtual host name) Logo/Avatar (Login Button), and external login screen display Mode (i.e., Popup/Main). The Site Administration > Config > Logins section includes a login management interface where Site Administrators can perform these tasks.
The screen is organized as follows:
| Domain Type | Description |
|---|---|
| Domain | A read-only field that displays the domain name as defined when the domain was configured using the Add Domain Wizard. The domain name cannot be modified. |
| Title | A read-only field that displays the description of the domain as defined when the domain was configured using the Add Domain Wizard. You can change the description in the Site Administration > Domains section using the Modify function. |
| Enable | A checkbox that allows you to enable or disable use of the domain. |
| Target Host | A text box that allows you to enter a virtual host name for a domain. See What is a Target Host? |
| Logo / Avatar | An Upload button that allows you to select a logo that will invoke the login page for the associated domain. |
| Mode | Mode allows you to select how the login page associated with a domain will be integrated. Two options are supported: Popup—Displays the external login page as a popup Main—Displays the external login page in the platform home page instead of a popup. Note: Mode options are not configurable for the default login page. |
Does the platform provide a default login?
When the platform is installed, a default login domain is automatically created and can be viewed and managed by the Site Administrator in the Site Administration > Config > Logins section.
- The default login domain is enabled by default.
- A new user can log in using the default login domain by clicking the Login/Signup on the platform Top Navigation and entering their email and password on the default Login page.
What is a Target Host?
Site Administrators can specify different URLs for logging into the platform based on roles (Administrator, Developer, User, etc.), or for a Backdoor Login if one of your domain configurations is down. This is accomplished by specifying a virtual host address for each login domain referred to as a Target Host (e.g., <role>.<company>.com).
The recommended approach is to develop a login plan for each role that covers different types of login scenarios.
- For example, if your site uses CA SiteMinder exclusively for logins, and the CA SiteMinder login is down for some reason, you will need a backdoor login to investigate the problem.
- In this scenario you could configure the platform default login Target Host so that only the Site Administrator can log in using email and password credentials.
- You could also configure an alternate Facebook (using the Facebook Connector domain) or Google login (using the OpenID Relying Provider domain) and specify a Target Host for backdoor logins.
What login page integration modes are supported?
The platform allows you to select how the login page associated with a domain will be integrated. The integration method is selected via the Mode option on the Site Administration > Config > Logins page for a specific domain. Two options are supported:
- Popup—Displays the external login page as a popup.
- Main—Displays the external login page in the platform home page instead of a popup.
Note: Mode options are not configurable for the default login page.
How do I enable and customize a platform login?
To enable and customize a platform login:
- Navigate to Site Administration > Config > Logins. The Configure screen displays a listing of domains that have been added to the platform.
- To enable the domain, click the checkbox in the "Enable" column.
- If you would like configure a virtual host for the domain, enter it in the "Target Host" text box. See What is a Target Host? for more information.
- In the Logo/Avatar column, click Upload and select the logo you would like to display for the Login button. See How do I upload and crop icons? for more information.
- In the Mode column, click the radio button of the identity store integration method (Popup or Main) you would like to use for the current domain. See What login page integration modes are supported? for more information.
- Click Save to commit your changes.
How do I disable a platform login?
To disable a platform login:
- Navigate to Site Administration > Config > Logins. The Configure screen displays a listing of domains that have been added to the platform.
- To disable the domain, uncheck the "Enable" column.
- Click Save to commit your changes.
Resources:
What is a Resource?
In the context of the Site Administration > Config > Resources section, a Resource is any type of publishing artifact used in the construction of the platform UI presentation. This includes css style sheets, images, sprite files, site copy, API documentation, and online help documentation.
How do I upload style sheets to the platform?
When you upload a new custom.less file in the Custom Styles section, the /resources/theme/default/style directory is automatically created and includes the site default style sheets. Some points to note:
- These style sheets cannot be updated using the upload process used for static content because the styles are regenerated each time a new custom.less style sheet is uploaded.
- If you want to add new styles to the platform, you must first download the template, custom_template.less, then rename it to custom.less, add the new styles to the custom.less file, and upload the modified file. When you upload the revised file in the Config section of the user interface, the new styles are added to the site as part of the rebuild process. For more information and detailed instructions, see To customize platform styles for the first time.
- Only a Site Administrator can update the platform style sheet.
How do I upload Sprite files to the platform?
If you've updated one or more Sprite files, you can create an /images folder in the /resources/theme/default/style directory and upload them. Sprite files must be uploaded AFTER you have uploaded your custom.less file and have rebuilt the site styles (either automatically as part of the custom.less upload process or manually by executing the Rebuild function).
To upload Sprite files to the platform:
- Navigate to Site Administration > Config > Resources.
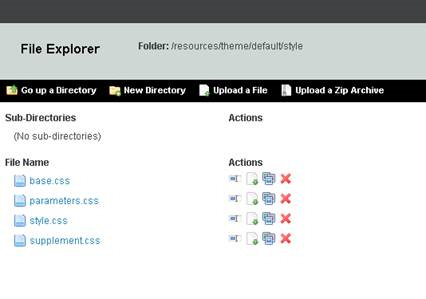
- In the Resources section click File Manager. Navigate to the /resources/theme/default/style directory. You will see the following default styles which were autogenerated as part of the custom.less upload process.
- Click New Directory and assign the name "images."
- Navigate to the /images directory.
- Click Upload. The File Upload dialog box displays. Select the Sprite file you would like to upload and click Open.
- Click Upload to upload the file to the selected directory. Repeat this process until all the Sprite files are uploaded.
How do I upload content to the platform?
Content that can be uploaded to the platform includes API documentation, Online Help, Landing Page, Signup, and Support. Content will typically consist of HTML files, images that are referenced in the content, any custom styles sheets that support the content, and reference material (i.e., PDF's, diagrams, etc.) that are linked in the content.
- API Documentation Content - The /content/api directory includes a folder for each API that is added to the platform. When you initially add your API using the Add a New API function this folder is automatically generated and an id name is automatically assigned as the folder name; for example, api100.cm. API content is uploaded to this folder.
- Online Help Content—The /content/home/learnmore directory includes html and supporting graphic files that comprise the platform Online Help.
- Landing Page Content - The /content/home/landing directory includes HTML and supporting files that comprise the platform home page, including images, content, css styles sheets, javascript files, and supplemental documents such as the Developer Agreements that are used as part of the platform signup process.
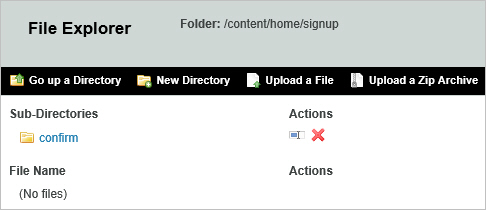
- Signup—The /content/home/signup directory includes an html that includes response content for various platform Signup scenarios.
- Support—The /content/home/support directory includes html and supporting graphic files that comprise the Support section of the platform.
To upload a file:
- Navigate to Site Administration > Config > Resources.
- In the Content section, click File Manager.
- Select the directory for the content area you would like to update.
- Click Upload. The File Upload dialog box displays. Select the file you would like to upload and click Open.
- To upload the file to the selected directory, click Upload. If you receive an overwrite message click OK.
How do I modify the landing page for the platform?
To modify the landing page, you must download it, modify it offline, and then upload it to the same location.
To modify the landing page:
- Navigate to Site Administration > Config > Resources.
- In the Content section, click File Manager.
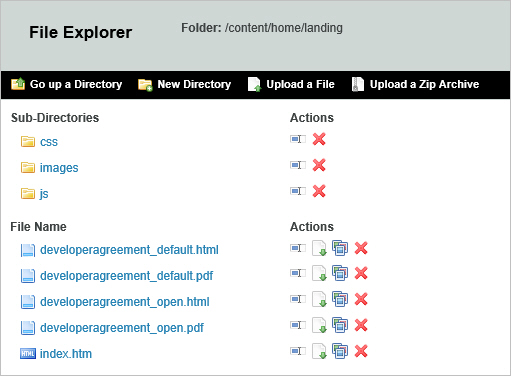
- Click into the content/home/landing directory.
- Locate the index.htm file and download it.
- Modify the file offline, and then upload the modified file using File Manager.
How do I upload the API and Online Help content style sheet to the platform?
The document.css style sheet contains all the custom styles for both API and Online Help documentation. It is located in the /content/style directory. If you make changes to the document.css file, you can upload it directly to the /content/style directory.
Note: This style sheet is not affected by the custom.less style sheet regeneration process and will not be changed or overwritten when a new custom.less file is uploaded.
To upload a document.css style sheet to the platform:
- Navigate to Site Administration > Config > Resources.
- In the Content section, click File Manager. Navigate to /content/style. You will see a directory similar to the following:
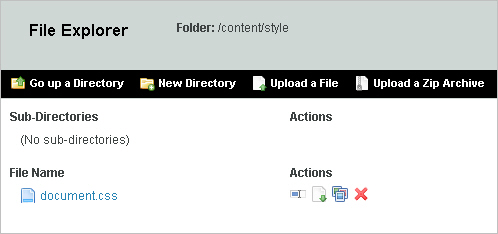
- Click Upload. The File Upload dialog box displays. Select the document.css file and click Open.
- To upload the file to the selected directory, click Upload. If you receive an overwrite message click OK.
Configuration:
How do I configure API settings?
You can configure API settings to determine which features will be available for all APIs on the platform. If a feature is disabled in the API settings page it will not be present in the user interface.
Unless otherwise noted, settings are either enabled or disabled.
You can configure the API settings shown in the tables below:
- General API Settings
- Public API Settings
- Private API Settings
General API Settings:
| This setting... | Controls this feature... |
|---|---|
| API Workflow Definition | The workflow definition (default or custom) that will apply to all new APIs on the platform (existing APIs are not affected). |
Public API Settings:
| This setting... | Controls this feature... |
|---|---|
| Supported | Determines whether public APIs are supported on the platform. Public APIs are visible to all users, including anonymous users. If this setting is disabled, only private APIs are allowed. |
| Ratings | Determines whether users can rate public APIs. If disabled, the ratings feature does not appear in the user interface. |
| Sandbox Endpoint | Determines whether public APIs will have the option of having a sandbox endpoint. |
| Reviews | Determines whether users can write and share reviews of public APIs. If disabled, the reviews feature does not appear in the user interface. |
| Sandbox Auto Approval | Determines whether public APIs with a sandbox endpoint will allow sandbox access automatically upon request, or will explicitly approve or deny each request. |
| Scopes | Determines whether the Admin will have the option to define scopes (part of the Licenses feature). If implemented, individual API operations can be assigned to different scopes for packaging into different licenses. |
| Production Endpoint | Determines whether public APIs will have the option of having a production endpoint. |
| Production Auto Approval | Determines whether public APIs with a production endpoint will allow sandbox access automatically upon request, or will explicitly approve or deny each request. |
Private API Settings:
| This setting... | Controls this feature... |
|---|---|
| Supported | Determines whether private APIs are supported on the platform. Private APIs are visible only to invited users. If this setting is disabled, only public APIs are allowed. |
| Ratings | Determines whether users can rate private APIs. If disabled, the ratings feature does not appear in the user interface. |
| Sandbox Endpoint | Determines whether private APIs will have the option of having a sandbox endpoint. |
| Reviews | Determines whether users can write and share reviews of private APIs. If disabled, the reviews feature does not appear in the user interface. |
| Sandbox Auto Approval | Determines whether private APIs with a sandbox endpoint will allow sandbox access automatically upon request, or will explicitly approve or deny each request. |
| Scopes | Determines whether the Admin will have the option to define scopes (part of the Licenses feature). If implemented, API operations can be assigned to different scopes for packaging into different licenses. |
| Production Endpoint | Determines whether private APIs will have the option of having a production endpoint. |
| API Scope Groups | Determines whether scope groups can be created. If this option is enabled, the API Admin can create groups via the API > Visibility > Groups page. |
| Production Auto Approval | Determines whether private APIs with a production endpoint will allow sandbox access automatically upon request, or will explicitly approve or deny each request. |
| Independent Group | Determines whether private APIs will have the option of having Private API Groups associated with them. |
To configure API settings:
- Go to Administration > Config > APIs.
- Change the settings as needed. For explanations of your choices, refer to the tables above.
- When done, click Save.
How do I configure app settings?
You can configure app settings to determine which features will be available for all apps on the platform. If a feature is disabled in the app settings page it will not be present in the user interface.
Unless otherwise noted, settings are either enabled or disabled.
Available app configuration settings are shows in the tables below:
- General App Settings
- Public App Settings
- Private App Settings
General App Settings:
| This setting... | Controls this feature... |
|---|---|
| User-Defined Identity | Determines whether an app's unique Runtime ID can be defined by a user rather than generated by the platform. |
| SImultaneous Access to Sandbox and Production | If enabled, grants access to both environments in one request. |
| App Workflow Definition | The workflow definition (default or custom) that will apply to all new apps on the platform (existing apps are not affected). |
Public App Settings:
| This setting... | Controls this feature... |
|---|---|
| Supported | Determines whether public apps will be supported on the platform. Public apps are visible to all users, including anonymous users. If disabled, only private apps are allowed. |
| Ratings | Determines whether users will be able to rate public apps. If disabled, the ratings feature does not appear in the user interface. |
| Reviews | Determines whether users will be able to write and share reviews of public apps. If disabled, the reviews feature does not appear in the user interface. |
Private App Settings:
| This setting... | Controls this feature... |
|---|---|
| Supported | Determines whether private apps will be supported on the platform. Private apps are visible only to invited users. If disabled, only public apps are allowed. |
| Ratings | Determines whether users will be able to rate private apps. If disabled, the ratings feature does not appear in the user interface. |
| Reviews | Determines whether users will be able to write and share reviews of private apps. If disabled, the reviews feature does not appear in the user interface. |
To configure app settings:
- Go to Administration > Config > Apps.
- Change the settings as needed. For explanations of your choices, refer to the tables above.
- When done, click Save.
How do I configure group settings?
You can configure group settings to determine which features will be available for all group on the platform. If a feature is disabled in the group settings page it will not be present in the user interface.
Unless otherwise noted, settings are either enabled or disabled.
Available group configuration settings are shows in the tables below:
- General Group Settings
- Public Group Settings
- Private Group Settings
General Group Settings
| This setting... | Controls this feature... |
|---|---|
| Group Support | Determines whether groups are supported on the platform. If this setting is disabled, nothing about groups appears in the platform and no other options relating to groups are available. |
Public Group Settings:
| This setting... | Controls this feature... |
|---|---|
| Supported | Determines whether public groups are supported on the platform. Public groups are visible to all users, including anonymous users. If this setting is disabled, only private groups are allowed. Valid values:
|
| Ratings | Determines whether users can rate public groups. If disabled, the ratings feature does not appear in the user interface. |
| Reviews | Determines whether users can write and share reviews of public groups. If disabled, the reviews feature does not appear in the user interface. |
Private Group Settings:
| This setting... | Controls this feature... |
|---|---|
| Supported | Determines whether private groups will be supported on the platform. Private groups are visible only to invited users. If this setting is disabled, only public groups are allowed. Valid values:
|
| Ratings | Determines whether users can rate private groups. If disabled, the ratings feature does not appear in the user interface. |
| Reviews | Determines whether users can write and share reviews of private groups. If disabled, the reviews feature does not appear in the user interface. |
To configure group settings:
- Go to Administration > Config > Groups.
- Change the settings as needed. For explanations of your choices, refer to the tables above.
- When done, click Save.
Workflow:
Which workflows can I customize?
You can customize the following workflows:
- API (Business Admin uploads in Administrator / Workflows; Site Admin specifies as default in Config / APIs)
- App (Business Admin uploads in Administrator / Workflows; Site Admin specifies as default in Config / Apps)
- API access request (must be changed in database; contact Technical Support)
- Group membership request (must be changed in database; contact Technical Support)
- Ticket (must be changed in database; contact Technical Support)
Note: OAuth grants cannot be customized at this time.
How do I set up and manage custom workflows?
The first step in implementing a custom workflow is for the Business Admin to develop the custom workflow and upload it to the platform. For more information on custom workflows and the upload process, refer to What is a custom workflow? and How do I set up and manage custom workflows?
Once the Business Admin has uploaded a custom workflow, the Site Admin can specify that workflow as the default for the resource type. From that point onwards, the new workflow applies to any new resources of that type. Existing resources are not affected.
Follow the instructions for the applicable object type:
- How do I specify a custom workflow for apps?
- How do I specify a custom workflow for APIs?
- How do I specify a custom workflow for app/API contracts?
- How do I specify a custom workflow for groups?
- How do I specify a custom workflow for tickets?
Note: when you specify a new custom workflow for a resource, it affects all future resources. Existing resources are not affected. In some cases, it's possible to modify the workflow used for an individual resource. For example, the API Admin or Business Admin can modify the workflow that a specific API uses, in the API Details page.
To view a custom workflow:
- Log in as Site Admin or Business Admin.
- Go to Admin > Workflows.
- Find the workflow on the list and click View. The workflow XML file is displayed in a separate window.
How do I specify a custom workflow for APIs?
The Site Admin can specify a custom workflow and set that as the default workflow for all future APIs on the platform. When the default workflow is changed, the new workflow applies to all new APIs, but existing APIs are not affected.
Before specifying the custom workflow as the platform default, the Business Admin must first create the custom workflow externally and upload it. For instructions, see To upload a custom workflow.
To specify a custom workflow for APIs:
- Log in as Site Admin.
- Go to Admin > Config > APIs.
- Under API Workflow Definition, click the drop-down list to choose the custom workflow. Note: If the workflow isn't available for selection, it hasn't yet been uploaded by the Business Admin. For instructions, see To upload a custom workflow.
- Click Save.
For more information on API settings, refer to To configure API settings.
How do I specify a custom workflow for apps?
The Site Admin can specify a custom workflow and set that as the default workflow for all future apps on the platform. When the default workflow is changed, the new workflow applies to all new apps, but existing apps are not affected.
Before specifying the custom workflow as the platform default, the Business Admin must first create the custom workflow externally and upload it. For instructions, see To upload a custom workflow.
To specify a custom workflow for apps:
- Log in as Site Admin.
- Go to Admin > Config > Apps.
- Under App Workflow Definition, click the drop-down list to choose the custom workflow. Note: If the workflow isn't available for selection, it hasn't yet been uploaded by the Business Admin. For more information, see To upload a custom workflow.
- Click Save.
For more information on API settings, refer to To configure API settings.
How do I specify a custom workflow for app/API contracts?
You can modify the default workflow for app/API contracts (API access requests), but there is currently no way to apply the custom workflow through the user interface. You'd need to make modifications to the database. If you need to do this, contact technical support for assistance.
How do I specify a custom workflow for groups?
You can modify the default workflow for groups, but there is currently no way to apply the custom workflow through the user interface. You'd need to make modifications to the database. If you need to do this, contact technical support for assistance.
How do I specify a custom workflow for tickets?
You can modify the default workflow for tickets, but there is currently no way to apply the custom workflow through the user interface. You'd need to make modifications to the database. If you need to do this, contact technical support for assistance.
How do I specify a custom workflow for OAuth grants?
You can modify the default workflow for OAuth grants, but there is currently no way to apply the custom workflow through the user interface. You'd need to make modifications to the database. If you need to do this, contact technical support for assistance.